
First Published - December 5, 2009
WordPress – Editing a Page or Post on your Website
Ok so you’ve made it this far and nothing’s blown up! 🙂
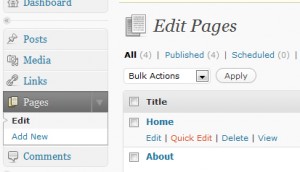 Your website should have some pages and or posts set up already ready for you to edit.
Hover your mouse over the page you would like to edit – you will see a number of options. Edit, Quick Edit, Delete and View
- Edit – yeh you got it this is the button to edit the content of your page.
- Quick Edit – allows you to do a number of things quickly, such as change the page order.
- Trash – hmm deletes the page, but don’t worry it will ask you to confirm if you really want to delete the page should you accidentally click it. If you really mess up and want the content back you can restore it from the Trash quickly and easily
- View – allows you to view the page.
The easiest way to use this feature is to right click the View link and open the page in a new tab. This means you have the front end (customer facing view) on one tab and the editor/admin area on the original tab.
Having your browser set up like this means you can flick backward and forward quickly and easily from editing view to the front end. Incidently – on the subject of browsers! WN6 Creative Design Creative prefer Firefox for lots of reasons so if you do fancy a change later go here and download it – it’s free so you’ve nothing to loose.
Anyway back to editing the page. Click the edit button on the page you wish to edit.
BANG!
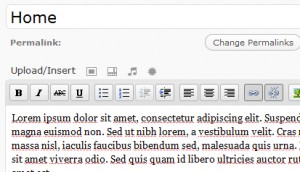 You should now see a page that looks something like the one. Looks like an ordinary text editor such as MS Word (Yuk) or Open Office (Hurrah more great free & legal software that works a treat). Features such as Bold, Italic, Underline, Bullet Lists, Number Lists, Left Align, Centre and Right Align all on the top bar.
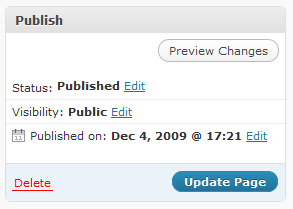 Type or edit the content in the main editor box. Once you have finished the content your typing click the Update Page Button you’ll find that on the furthest right hand side of the editing screen. If you can’t see it, click the PUBLISH tab and some more options should appear a lot like the image on the right.
Great stuff you have now edited content on a page. You can do this for any of the pages you wish or create a new one if you like.
Remember your website has been set up with a style sheet so the font, font colour and sizes are controlled automatically for you, so really you should only need to use bold and italic if you want something to stand out. Keeping a consistent look is an essential part of keeping your site looking smart and professional.
HOWEVER! Some people may wish to change the colour a little and there’s an easy way to do this is first – click a button that looks like this (it’s on the far right hand side of the formatting bar (the one that starts with the B for Bold.) Hey presto, another editing bar appears. Like the one below.

Ok, this is where you could get yourself in a muddle. But with care you should be fine. To change the colour of any words, you will first need to highlight the words you want to change and then go to the button next to the smilie face – the one that looks like an A with a line under it and a drop down arrow connected to the button. Click this
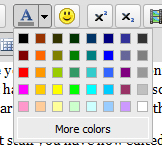 You’ll be presented with a set of colours and a button that says ‘more colors’
Go on choose one or have a play with the more colors option – it looks something like the one on the right.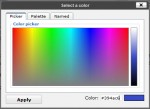
Your text can now be changed to whatever colour you wish!
And yes if you click the smilie face button you can add….. 😆 smilie faces, should you wish to cheer your reader up?
On the subject of inserting smilie faces – you will notice when you insert one it will be displayed in your editor as :lol or something similar, don’t worry the software will insert the appropriate smilie accordingly.
Ok who’s for adding images?